Pages

Showing posts with label dairy free. Show all posts

Wednesday, 21 May 2014

Baked Falafels

This months has passed in a crazy fast whirlwind of busyness. Although I haven't been blogging much due to some complicated internet issues, I have been working hardcore behind the scenes to get a few things complete for the next step of Plates for Plants


My partner and I have been working lonnng hours to get the new Plates for Plants website up and running. It is looking pretty darn good if I do say so myself and will blow what it currently looks like out of the water! I've been on  steady learning binge with HTML and CSS terms being crammed into my brain. I'm loving it!


Also, I;ve been working hard on the next eBook. I'm planning for a July release, just in time for this blog's first anniversary! I can't believe it's already coming up fast. I'll be releasing sneak peeks and details throughout June to get you guys as excited as I am about it!


Now let's get to the REALLY important stuff. The food! This was my first time making falafels, not to mention oil and fat free ones. They come out a bit denser than their fried counterparts, but just as delicious. I used the traditional method of using chickpea that haven't been cooked prior. They just soaked overnight and I poured some boiling water over them the next morning to soften them a bit. That being said, since these are being baked I think that a short 10 minute par-boil would make them less dense. I'll try that next time I make some.


These are perfect for a late afternoon snack on their own, or on a salad as pictured. I'm excited to try them in a wrap as well! The salad was fairly simple, just leaf lettuce, tomatoes, cucumber, olive and parley with some hummus for a dressing. A simpel Tahini-Lemon dressing would also be great here.


Baked Falafels

Ingredients:

- 1 lb dried chickpeas, soaked overnight
- 1 large onion, minced
- 1/2 bunch fresh parsley, chopped fine
- 2 garlic cloves, minced
- 2 tbsp lemon juice
- 1 tbsp cumin
- 1 tsp fresh ground pepper
- 1 tsp salt (or to taste)
- 1 hot pepper, minced (opt)

Pre-heat oven to 350F

Drain your chickpeas and toss them into your food processor or blender. I had to do this in batches, so I added a relatively proportionate amount of the other ingredients in the blender per batch.

Pulse until everything is well incorporated and ressembles a paste. But be careful not to make it a mush either! This isn't hummus. It should still be visibly flakey. 

Toss everything into a large bowl and mix in with your hands to get everything evenly distributed.

Test to see if the mixture holds together, if it's too wet add a bit of flour, if too dry, add a little water.

With your trusty hands, start forming balls of equal size, then lay them out on a parchment paper line baking sheet and flattem them to disks as pictured.

Bake for about 30 minutes. I found that I didn't have to flip them, but you can do so if desired at the halfway mark.

Enjoy!


Monday, 5 May 2014

Cinco de Mayo Menu

To me, the best part about any celebration is the food. It's what brings people together. My family always tends to hang out in the kitchen anyways, so having some great food to celebrate coming together is a must.


Cinco de Mayo brings visions of Mexican food, both traditional and fusion. It's an easy celebration to make plant-strong and healthy too! Here are my choices for the day:


Thursday, 24 April 2014

Roasted Tomato Salsa

Experiencing the rainy season here is interesting. Some days it threatens to rain all day, but not a drop. Other days it's bright and sunny in the morning, then turns dark and gloomy pretty quick. Today is one of those days. Planning hikes and fruitlucks isn't obvious at this point, but we are risking a beach day on Saturday to hangout with a few fruities in the area. I'm crossing my fingers that it'll be sunny!


Being here has really taught me to be much more self sufficient when it comes to food. In Canada we are so used to things like salsa and hot sauce being both easily accessible and reasonably priced. Here they are usually expensive or full of preservatives and msg or salt. So I've got into the habit of making them myself so thatI can control the ingredients and lower my sodium intake drastically. Not to mention I get to actually pile it on instead of rationing those tiny jars they sell.


Something that may seem like alot of work is actually pretty simple and not too time consuming when you roast the majority of the ingredients. We are salsa obsessed around here, so we go through a large batch a week. No need to can it.


I'm sure it would be pretty simple to can though, I'm just no expert and prefer making batches that will last us a week at most. There are endless variations you can make to this salsa to change up the flavors. This is a basic roasted tomato recipe that is a great place to start from.


To serve with our salsa, I just toasted up some corn tortillas to dip in. We also use it to top our evening meals like rice and potatoes.


Roasted Tomato Salsa

Ingredients:

- 5 lbs of tomatoes
- 4 medium/large onions
- 3 large red bell peppers
- 1 tbsp cumin
- 2 tbsp hot sauce of choice or roasted hot peppers
- 1/2 cup lime juice
- 1/2 cup chopped cilantro (opt, not shown)
- S/P

Heat Oven to 400F

On a large deep baking sheet line up the tomatoes, onions (skin on) and red bell peppers. Roast for 35-40 minutes then let cool until they can be easily handled by hand.

Skin and core the tomatoes, and skin and de-seed the peppers.

In a large bowl, dump all the tomatoes and squish then with your hands until they reach the texture that you desire. You can also use a food processor for this step if you aren't the hands on type. Drain about half the water, depending on how thick you like your salsa (My partner like to drink the juice, it's quite good!)

Chop the pepper and onions to desired size and add into the bowl. 

Add in the spices, cilantro and lime juice. Give it all a good stir and let sit in the fridge in a tightly covered bowl until ready to serve. It tastes even better the next day!


Sunday, 20 April 2014

Mexican Lasagna

As our adventure time here in Costa Rica is fast coming to a close (only 5 weeks left!), I'm attempting to take advantage of this place to the best of my ability. Waterfalls, beaches and fruit will be through-fully experienced and enjoyed.


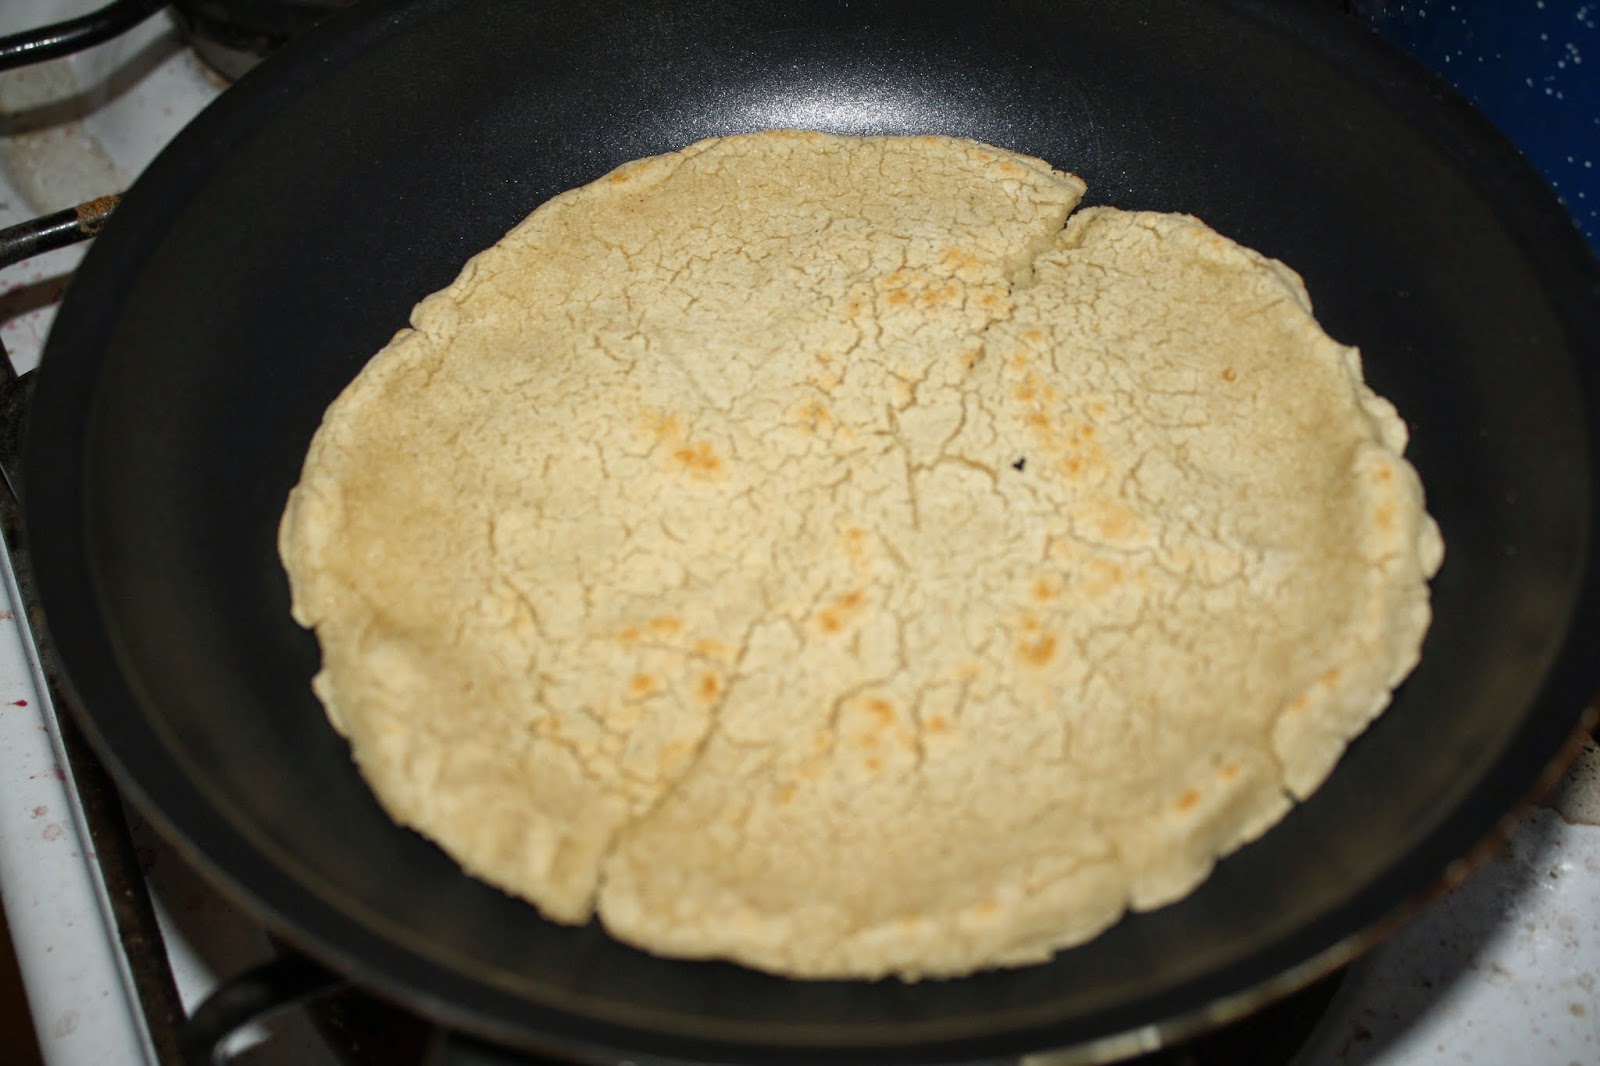
Another thing that I am going to miss is freshly made tortillas, that are pre-made for you. Although I've learned to make them from scratch, they are a tad time consuming to make.


This dish is definitely rated in my top ten favorites on the blog so far. The layers of flavor of this Mexican inspired lasagna make me smile in delight when I take a bite. The spicyness level depends on a few things: how hot your jalapenos are and how many you use. As you can see, I went a little overboard...


Mexican lasagna is like a taco casserole, or a layered soft taco. You can change up the fillings layers to anything you want. As you know I do like keeping it pretty simple most of the time. Although I did whip up the sauce portion from scratch, it doesn't take much time to assemble and bake.


I really recommend going with the corn tortillas here though, they lend a flaky-ness that won't be present if you use anything else. That being said, it would still be delicious with a brown rice tortilla or anything you can find at your local grocer.


If you do decide to make a variation of this, please share it with me. You can link below in the comments, share with our Facebook page or our twitter account. I'll be starting on Instagram soon as well, just have to remember to take pics with the Ipad too...


Mexican Lasagna

Ingredients:

- 10 corn tortillas
- 3 tomatoes, diced
- 1 medium onion, sliced
- 1 red pepper, sliced
- 1/4 cup + 1/4 cup jalapeno slices
- Oregano
- Red Pepper flakes
- S/P
- 1 avocado
- Hot sauce

Pre-heat oven to 350F.

In a large pan, water sauté the onions on medium/high heat until translucent, about 3 minutes. Mince 1/4 cup of the jalapeños. Add in the tomatoes, red pepper, minced jalapeño and spices.

In a casserole dish or oven safe plate, add a little sauce in the bottom then layer a tortilla, some beans and sauce and keep layering until none is left. 

Bake in the oven for 25-30 minutes. Top with jalapeños, avocado and hot sauce as desired.

Enjoy!


Thursday, 10 April 2014

Red Bean Curry Soup

RAIIINNNN!

After a very dry month or so, this place was in dire need of some rain. Especially after the last few days where it was SO humid and looked like rain, but really it was just a tease. Hopefully this helps with the ridiculous humidity, I've seen better hair days.


Now I know that most of readers are still battling winter. Which is why I thought this recipe would be most suitable to post. A warming curry soup is all one needs to soothe the weather grumpies.


This recipe is also a quickie. If you pre-cook your rice and beans, or used canned, it comes together in less than 30 minutes.


I had to get a bit creative since lentils (my go-to) are sparse and expensive in these parts but fresh beans are a-plenty and delicious. You know they are going to be good when the people at the market are shelling them on the spot.


Curry and I have been very good friends since I went plant-based. I actually wasn't introduced to Indian food formally until after the change. I became an addict pretty quickly and was extremely sad when my favorite restaurant burnt down. I've never been able to find a replacement for it. It was that good!


So I decided to try to master the curry at home instead, see if I could get close. My Channa Masala is always a crowd pleaser and I love experimenting with different cuisines. This one is definitely going to be added to my Indian dinner party foods.


Red Bean Curry Soup

Ingredients:

- 2 cups cooked red beans
- 2 cups cooked rice
- 1 medium onion, diced
- 2 large carrots, sliced
- 2 roasted red peppers, sliced
- 2-3 cups water or veg broth
- 1 tbsp curry powder
- S/P to taste

In a medium-large saucepan, water sauté the onions until translucent, about 3 minutes. Add the carrots and curry powder and cook for another 3 mins stirring often to prevent burning and adding water as needed. Dump in the rest of the ingredeints and simmer for about 20 minutes. Taste and adjust seasonings.

You can top with fresh tomatoes and sour cream of choice.

Enjoy!

Monday, 10 March 2014

Meatless Monday: Tortilla Pizza from Scratch

I have been lazy these past few days.


I'm making excuses to not do much work and read my days away (or watch season 5 of Grey's Anatomy) because it's my "birthday week" and all. But then again, I'm making massive amounts of banana ice cream that could count as testing for my next ebook...


On the other hand, I really don't think having a few days "off" is a bad idea at all. We all have this mentality drilled into us that always being busy is good and means we're being productive. Down time is a necessity and I have been working 6-7 days a week lately. Off days usually involve going to the market and the odd beach day. I'm definitely planning on taking more days to enjoy this amazing country.

What do you do to unwind?


I like to sleep in (which now means anytime past 7) and take my sweeeet time getting out of bed. An easy breakfast before a short yoga session, then either reading a book, taking a walk or lazing around watching a movie. The day just continues this way. I make easy simple meals, or if I feel like it's an "indulge" day, I'll make 3 recipes in a day. Sometimes my lazy days mean eating days. In comes the tortilla pizza.


This is one recipe that would fit in nicely between either of my favorite lazy days. It isn't too complex and doesn't take very long, but it tastes indulgent and makes for a great movie meal. I can easily eat 5-6 of them... Pizza doesn't have to be junk food! Make it in a  tortilla and it becomes an easy meal to whip up any day of the week.

I made this one south-american themed, but you can easily make it more traditional with your toppings of choice.


Tortilla Pizza
Fixings:

-       Crust:
o   1 cup masa harina
o   ½ cup water
-       Toppings:
o   Steamed kale
o   Roasted red peppers
o   Fresh tomatoes

o   Refried Beans

Mix the crust ingredients together until a firm dough is formed. Separate the ball into two roughly even ones and roll them out with the method detailed here, but thicker and with a tiny crust if desired. Also, leave it on until crisp instead of still soft, you want that crunch for your pizza.

You can also use store bought tortillas to make this extra fast and convenient.

Add on your toppings of choice, I used refried beans topped with sautéed kale and red peppers plus fresh tomatoes and a sprinkle of nooch.

Put the assembled deliciousness back into the pan or into the over to crisp up and heat the toppings up.

*** SIDENOTE***

I've just release a FREE ebook "12 Quick and Decadent Smoothie Recipes". You can get it right now by signing up for my newsletter in the right sidebar. Enjoy!

Monday, 24 February 2014

Meatless Monday's: Mushroom Gravy

I've come to realize that making otherwise non-vegan friendly comfort foods into healthy vibrant dishes is sort of becoming my thing. I'm loving that I can eat all these things without a deep-fryer, excess salt and all that jazz. That being said, I don't really want to box this blog into just being that one thing.


Challenges could also be considered my thing.

Although this gravy is barely a challenge since it's been around in the standard diet for quite some time and probably one of the easiest things to make without oil or animal products. I've had it over a million different dishes and now it's always a pleasant surprise to find many restaurants using mushroom gravy instead of their meat based counterparts.


Since I'll be reembarking onto the raw fruity wagon as of my birthday on the 7th of March, I'll be posting many more raw recipes: smoothies, salads, dishes, snacks... However I do have many recipes still in reserve so those will be popping up now and again as well.

Onto the food!


Mushroom Gravy

Ingredients:

- 4 cups sliced or diced mushrooms (I used portobellos)
- 1 medium onion, minced.
- 2.5 cups broth or water
- 2-3 tbsp gluten-free flour
- 2-3 tbsp Braggs Soy seasoning or tamari
- Generous pinch black pepper

In a deep pan, sauté the onion with a bit of water until translucent, add the mushrooms and cook until they start releasing juicy goodness.

Add in the broth/water, braggs and black pepper. Then whisk the flour in a bit of water until well combined and add it a bit at a time to the pan while whisking it continuously and waiting a bit between each addition until you've reached the consistency that you enjoy.

Serve it over mashed potatoes, rice, veggies... Whatever feels right!

Enjoy!

ALSO: as I have mentioned I have some plans to grow the blog. I would LOVE your input and have put together a short 2 minute survey. I would be eternally grateful if you could fill it out.
Here's the link. https://www.surveymonkey.com/s/YJ6PH75


Like what you see?

Check out and LIKE the Plates for Plants FACEBOOK PAGE and see updates, pictures and new posts and sign up for our NEWSLETTER for exclusive content and a soon to be released ebook! (See the top right corner to sign up!)


Monday, 17 February 2014

Meatless Monday's: Creamy Chipotle Potato Soup

I think that the food group people worry about missing the most when going plant-based is dairy. Which isn't surprising because not only is it actually addictive, the taste and texture is seen as hard to mimic.


Nowadays, this couldn't be further from the truth.

With the development of nut cheeses as well as the soy and tapioca based ones, there is a wide array to choose from on that end. They are great transition foods, and a treat now and again.

There are some things that can make creamy delicious dishes without any of them AND be low-fat. The magic is in the potatoes! (or cauliflower, but that's for another post)

I also used a little homemade coconut milk to make it even more decadent, but it isn't essential if you want to keep this meal fat-free.

You can choose to top this with any vegetables, but I found that roasted broccoli was the perfect compliment. Any wilted greens would also work very well.


Creamy Chipotle Potato Soup

-       10-12 medium potatoes (I used a mix of red and yellow)
-       2-3 cup of water or veggie broth
-       1 onion, diced.
-       ¾ cup nutritional yeast
-       1 tbsp chipotle flakes (or more depending on how spicy you like it)
-       1 cup coconut milk (I used homemade)
-       S/P

Toppings:
-       1 head broccoli, cut into florets
-       1 onion, sliced

Pre-heat the oven to 400F.

On a cookie sheet, spread out the toppings and roast for 20-25 minutes, until cooked through.

In a large pot, boil the potatoes until tender. I always slice them into smaller pieces to speed up the process. Whole potatoes take an eternity.

Drain the cooking water and in batches, blend the potatoes with the rest of the ingredients, making sure to use enough liquid for each batch to get super smooth and creamy. Put it all back in the same pot, or soup container thing (see pictures, I can’t think of the proper name…). Either top the serving bowl with the broccoli mix, or each individual bowl.

Serve hot, with a simple salad.

Enjoy!!

ALSO: as I have mentioned I have some plans to grow the blog. I would LOVE your input and have put together a short 2 minute survey. I would be eternally grateful if you could fill it out.
Here's the link. https://www.surveymonkey.com/s/YJ6PH75


Like what you see?

Check out and LIKE the Plates for Plants FACEBOOK PAGE and see updates, pictures and new posts and sign up for our NEWSLETTER for exclusive content! (See the top right corner to sign up!)