Pages

Showing posts with label low fat. Show all posts

Monday, 23 June 2014

Yam Enchiladas

Sometimes, when you really work hard at what you want and keep a positive attitude (well, for the most part anyway) you find yourself exactly where you planned on being. As much as it took a bit more time than I wanted, I finally found a job that suits my needs and allows me to continue working on Plates for Plants.


I am lucky enough that this also means that I get to work from home! Time saved, no need to commute and no need for bus passes and less temptation to eat out are all massive perks.


And more time for food! It's nice because since being back in Canada, I'm not rushed to absolutely have to do recipes during the day, since the sun doesn't set at 6pm every single day as it did in Costa Rica. Which means good pictures are available for a much longer time period!


Okay, let's get to the food. This recipe is quite delicious and since we are very partial to any type of latin american food, it was very popular. These enchiladas are quite simple to make, you can even make the filling ahead of time, as well as the sauce. So when dinner comes around all you have to do is warm the tortillas, stuff and roll them and slater them in sauce. In the oven and voila! Dinner is served.


As always you can adjust the spice level to your preferences. I enjoy a sprizt of lime and a tumble of avocado to top mine, but yet again if you want to keep your fat intake as low as possible, omit the avocado.


Yam Enchiladas

Ingredients:

- 2 large yams, peeled and cubed.
- 3/4 cup black beans
- 1 small onion, minced
- 1 bell pepper, diced finely
- 1 tsp cumin
- S/P
- 10 corn tortillas

Sauce:

- 2-3 large tomatoes
or
- 2 cups tomato sauce
- 1 jalapeño
- 1 tsp cumin
- 1 red pepper

Pre-heat oven to 350F

Boil the yams until tender.

In a large pan, water sauté the onion and pepper until softened, about 5-6 minutes.

Transfer yams and vegetables into a large bowl and mash until well incorporated. Add spices. Warm the tortillas in the oven and then stuff and roll them, about 2-3 tbsp of filling per tortilla. 

While the potatoes are boiling, blend the tomatoes or tomato sauce with the rest of the sauce ingredients and simmer until it has reduced to a thick consistency. 

Pour some sauce into an oven safe dish to cover the bottom, then add in the enchiladas and then pour the rest over them. Bake for 20-30 minutes.

Enjoy!

Thursday, 19 June 2014

Chickpea "Tuno" Salad

Fresh and vibrant are my two favorite words when it comes to food. I mean, there are a million words with which food can be described, but when a dish is made of pure fresh and alive ingredients, it just resonates with me. The way it tastes combined with the amazing feeling of fresh foods is incomparable. 


Even better, is making some food that "someone" was craving but just doesn't fit in our usual arsenal of healthy and plant-strong foods. Sometimes, when you've eaten a certain food your whole life, in this case tuna, it resurfaces as a comfort food craving.


It happens to everyone! The fun thing is, it gives me an awesome outlet to be creative in choosing healthier foods, that still fulfil that craving! This chickpea based "tuno" salad is vibrant and delicious served as a lettuce wrap, a sandwich or a topping on a salad.


It has a nice "fishy" taste from both the seaweed and capers, although they can be used interchangeably I find that the combination of the two really gives it the perfect flavor profile.


Dig in!


Chickpea "Tuno" Salad

Ingredients:

- 2 cups chickpeas, cooked
- 1 avocado, mashed
- 1 sheet nori, crushed finely
- 1-2 tbsp capers, minced
- 2 tbsp lemon juice
- 1 green onion, chopped
- S/P

In a large bowl, mash the chickpeas until they are just flaking. Be careful not to overdue it, we don't want hummus wraps!

Add in all the other ingredients and stir well to combine evenly.

Serve in lettuce wraps with tomatoes, in a sandwich or on a salad.

Enjoy!


Wednesday, 21 May 2014

Baked Falafels

This months has passed in a crazy fast whirlwind of busyness. Although I haven't been blogging much due to some complicated internet issues, I have been working hardcore behind the scenes to get a few things complete for the next step of Plates for Plants


My partner and I have been working lonnng hours to get the new Plates for Plants website up and running. It is looking pretty darn good if I do say so myself and will blow what it currently looks like out of the water! I've been on  steady learning binge with HTML and CSS terms being crammed into my brain. I'm loving it!


Also, I;ve been working hard on the next eBook. I'm planning for a July release, just in time for this blog's first anniversary! I can't believe it's already coming up fast. I'll be releasing sneak peeks and details throughout June to get you guys as excited as I am about it!


Now let's get to the REALLY important stuff. The food! This was my first time making falafels, not to mention oil and fat free ones. They come out a bit denser than their fried counterparts, but just as delicious. I used the traditional method of using chickpea that haven't been cooked prior. They just soaked overnight and I poured some boiling water over them the next morning to soften them a bit. That being said, since these are being baked I think that a short 10 minute par-boil would make them less dense. I'll try that next time I make some.


These are perfect for a late afternoon snack on their own, or on a salad as pictured. I'm excited to try them in a wrap as well! The salad was fairly simple, just leaf lettuce, tomatoes, cucumber, olive and parley with some hummus for a dressing. A simpel Tahini-Lemon dressing would also be great here.


Baked Falafels

Ingredients:

- 1 lb dried chickpeas, soaked overnight
- 1 large onion, minced
- 1/2 bunch fresh parsley, chopped fine
- 2 garlic cloves, minced
- 2 tbsp lemon juice
- 1 tbsp cumin
- 1 tsp fresh ground pepper
- 1 tsp salt (or to taste)
- 1 hot pepper, minced (opt)

Pre-heat oven to 350F

Drain your chickpeas and toss them into your food processor or blender. I had to do this in batches, so I added a relatively proportionate amount of the other ingredients in the blender per batch.

Pulse until everything is well incorporated and ressembles a paste. But be careful not to make it a mush either! This isn't hummus. It should still be visibly flakey. 

Toss everything into a large bowl and mix in with your hands to get everything evenly distributed.

Test to see if the mixture holds together, if it's too wet add a bit of flour, if too dry, add a little water.

With your trusty hands, start forming balls of equal size, then lay them out on a parchment paper line baking sheet and flattem them to disks as pictured.

Bake for about 30 minutes. I found that I didn't have to flip them, but you can do so if desired at the halfway mark.

Enjoy!


Monday, 5 May 2014

Cinco de Mayo Menu

To me, the best part about any celebration is the food. It's what brings people together. My family always tends to hang out in the kitchen anyways, so having some great food to celebrate coming together is a must.


Cinco de Mayo brings visions of Mexican food, both traditional and fusion. It's an easy celebration to make plant-strong and healthy too! Here are my choices for the day:


Thursday, 24 April 2014

Roasted Tomato Salsa

Experiencing the rainy season here is interesting. Some days it threatens to rain all day, but not a drop. Other days it's bright and sunny in the morning, then turns dark and gloomy pretty quick. Today is one of those days. Planning hikes and fruitlucks isn't obvious at this point, but we are risking a beach day on Saturday to hangout with a few fruities in the area. I'm crossing my fingers that it'll be sunny!


Being here has really taught me to be much more self sufficient when it comes to food. In Canada we are so used to things like salsa and hot sauce being both easily accessible and reasonably priced. Here they are usually expensive or full of preservatives and msg or salt. So I've got into the habit of making them myself so thatI can control the ingredients and lower my sodium intake drastically. Not to mention I get to actually pile it on instead of rationing those tiny jars they sell.


Something that may seem like alot of work is actually pretty simple and not too time consuming when you roast the majority of the ingredients. We are salsa obsessed around here, so we go through a large batch a week. No need to can it.


I'm sure it would be pretty simple to can though, I'm just no expert and prefer making batches that will last us a week at most. There are endless variations you can make to this salsa to change up the flavors. This is a basic roasted tomato recipe that is a great place to start from.


To serve with our salsa, I just toasted up some corn tortillas to dip in. We also use it to top our evening meals like rice and potatoes.


Roasted Tomato Salsa

Ingredients:

- 5 lbs of tomatoes
- 4 medium/large onions
- 3 large red bell peppers
- 1 tbsp cumin
- 2 tbsp hot sauce of choice or roasted hot peppers
- 1/2 cup lime juice
- 1/2 cup chopped cilantro (opt, not shown)
- S/P

Heat Oven to 400F

On a large deep baking sheet line up the tomatoes, onions (skin on) and red bell peppers. Roast for 35-40 minutes then let cool until they can be easily handled by hand.

Skin and core the tomatoes, and skin and de-seed the peppers.

In a large bowl, dump all the tomatoes and squish then with your hands until they reach the texture that you desire. You can also use a food processor for this step if you aren't the hands on type. Drain about half the water, depending on how thick you like your salsa (My partner like to drink the juice, it's quite good!)

Chop the pepper and onions to desired size and add into the bowl. 

Add in the spices, cilantro and lime juice. Give it all a good stir and let sit in the fridge in a tightly covered bowl until ready to serve. It tastes even better the next day!


Sunday, 20 April 2014

Mexican Lasagna

As our adventure time here in Costa Rica is fast coming to a close (only 5 weeks left!), I'm attempting to take advantage of this place to the best of my ability. Waterfalls, beaches and fruit will be through-fully experienced and enjoyed.


Another thing that I am going to miss is freshly made tortillas, that are pre-made for you. Although I've learned to make them from scratch, they are a tad time consuming to make.


This dish is definitely rated in my top ten favorites on the blog so far. The layers of flavor of this Mexican inspired lasagna make me smile in delight when I take a bite. The spicyness level depends on a few things: how hot your jalapenos are and how many you use. As you can see, I went a little overboard...


Mexican lasagna is like a taco casserole, or a layered soft taco. You can change up the fillings layers to anything you want. As you know I do like keeping it pretty simple most of the time. Although I did whip up the sauce portion from scratch, it doesn't take much time to assemble and bake.


I really recommend going with the corn tortillas here though, they lend a flaky-ness that won't be present if you use anything else. That being said, it would still be delicious with a brown rice tortilla or anything you can find at your local grocer.


If you do decide to make a variation of this, please share it with me. You can link below in the comments, share with our Facebook page or our twitter account. I'll be starting on Instagram soon as well, just have to remember to take pics with the Ipad too...


Mexican Lasagna

Ingredients:

- 10 corn tortillas
- 3 tomatoes, diced
- 1 medium onion, sliced
- 1 red pepper, sliced
- 1/4 cup + 1/4 cup jalapeno slices
- Oregano
- Red Pepper flakes
- S/P
- 1 avocado
- Hot sauce

Pre-heat oven to 350F.

In a large pan, water sauté the onions on medium/high heat until translucent, about 3 minutes. Mince 1/4 cup of the jalapeños. Add in the tomatoes, red pepper, minced jalapeño and spices.

In a casserole dish or oven safe plate, add a little sauce in the bottom then layer a tortilla, some beans and sauce and keep layering until none is left. 

Bake in the oven for 25-30 minutes. Top with jalapeños, avocado and hot sauce as desired.

Enjoy!


Tuesday, 15 April 2014

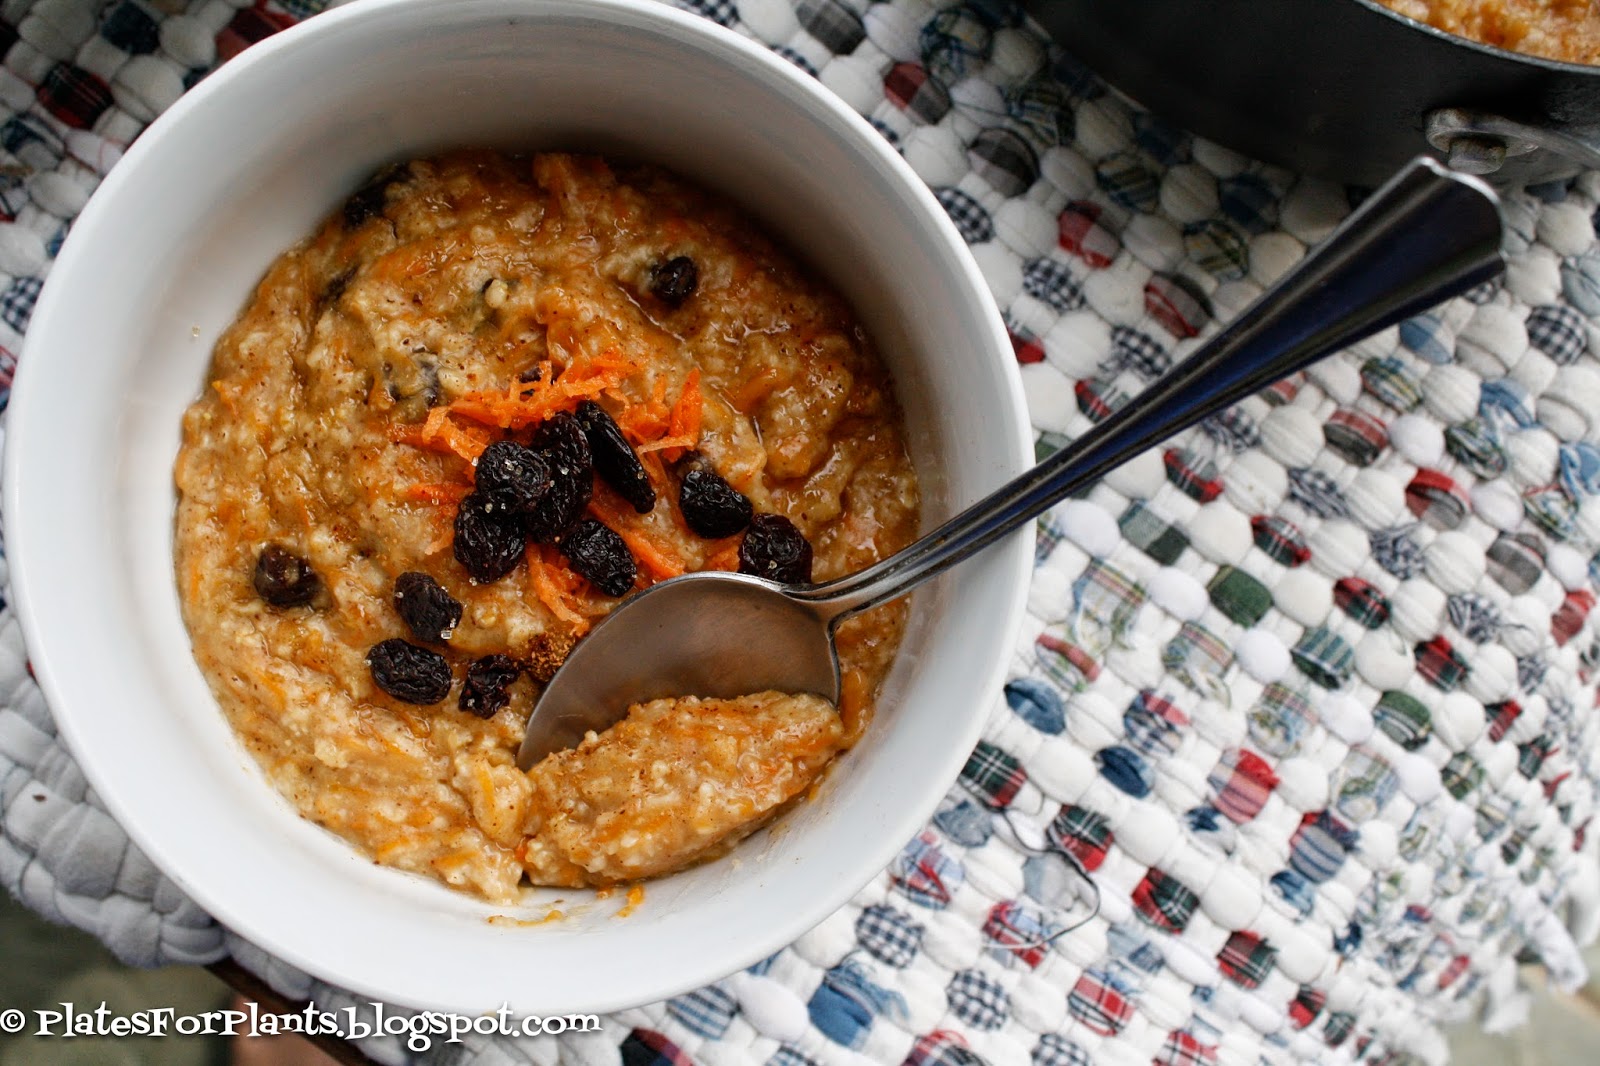
Carrot Cake Oatmeal

It's finally starting to rain here, which is a welcome break from the humidity we've been getting lately. Although I hear that Mother Nature is being quite moody back in Canada, so I am feeling good about having to deal with humidity instead of snow...


That beign said, we get colder days now and a nice warm bowl of oatmeal is a nice treat in the evenings to enjoy warm food again without sweating. Although, mango season is now in full swing and I cannot get enough of them. They are like nature's candy!


As a kid, I usually had my oatmeal the same way every time; plain with heaps of brown sugar on top. Simple and delicious paired with a few slices of toast to dip in. Now I like to play around with the flavors I can achieve. The Carrot Cake oatmeal is a result of said play time.


The first gluten free cake I ever baked (successfully) was a heavily spiced carrot cake smothered in cream cheese icing. While this bowl lack the icing portion, it more than satisfies any craving that may arise.


I also noticed lately that oatmeal has become somewhat of a food trend in the blogging world, overnighted, baked it comes in a million different methods and flavors now. Gone are the days of pouches of quicks oats with mystery powders and dried fruit to bring flavor to a staple.


I have to say, that I am very happy I will never eat one of those again. I mean, I loved them at the time, but looking at the long list of ingredients on those things now has me running for the produce aisle.


Carrot Cake Oatmeal

Ingredients:

- 3/4 cup coarse raw sugar*
- 1/3 cup water
- 2 cups quick oats
- 2 cups finely shredded carrots
- 1 tbsp cinnamon
- 1/2 tsp nutmeg
- 1/2 tsp ground ginger
- 3/4 cup raisins

* If you are using a fine sugar, reduce to 1/2 cup

In a medium sauce pan, bring the sugar and water to a boil and let thicken. Keep an eye on it so that is doesn't burn and stir often.

In another pot, cook the oatmeal with the carrots and spices with as much water as you prefer. I usually use a 1:1 ratio.

Once the oatmeal is cooked, stir in the caramel and raisins.

Enjoy!
Sunday, 6 April 2014

Tex-Mex Stacks

This post is officially the most time consuming one I have ever posted. 

Not because the recipe was complicated or anything. But because our internet suddenly decided to go back in time to the 90's and act like dial up. 


I think the total time with page loading, image uploading and waiting for other various things to work properly, this will have taken me 6-7 hours to get up on here. If that doesn't display passion and perseverance, I don't know what does!


On the other hand, this may be curbing my social media obsession, Pinterest is impossible to load right now...


Back to the food! This little beauty came to life from various leftovers and odd and ends I had to use up. It comes together in a second if you have cooked rice and potatoes ready to go. The tex-Mex flavors are strong and delicious. You can also amp up the heat with a generous coating of hot sauce.


I was going through quite the roasting phase for awhile and I think the way the tomatoes came out on this was the reason for it. I've started making my own salsa and hot sauces as a result and I don;t think I'll ever go back to buying them pre-made.


You can easily make this recipe fat-free by omitting the guac and the coconut cream if you are monitoring those macros. Although the plantains dipped in guac are sooooo good!


Tex-Mex Stacks
Ingredients:

1.5 cups refried beans
4 tomatoes, sliced
4 cups rice, cooked
2 large potatoes, sliced
1 recipe guacamole
4 tbsp coconut cream (coconut meat and water blended)
Oregano, cumin, red pepper flakes, S/P

In a casserole dish layer the ingredients as follows: potato, refried beans, rice, potato, tomato. Sprinkle with the spices as desired.

Bake at 350F until heated through and the tomatoes are cooked.

Top with guacamole and coconut cream and serve with baked plantains. 

Enjoy!


Wednesday, 19 March 2014

Mango Chutney

Mango season is upon us!

To me, this is a truly epic time of year, seeing as mangoes are one of my most favorite staple fruits that are only amazing a few times a year. (Not to mention so much more affordable!)


However, there comes a time where they aren't so great, a bad batch or you cut them before they are actually ripe because you;re just TOO excited to get in on the mango goodness.


This is where Mango Chutney comes to the rescue. We we're a little too excited and jumped the ship on waiting for the mangoes to be be truly in season down here. So it resulted in a few not so great mangoes that neither of us wanted to eat raw. It's not that they were bad per say, they just lacked the amazing mango-ness that we expected and we're less sweet than expected.


This recipe is super easy to make and delicious as a condiment on pretty much anything. We had it that night along with some simple Thai Yellow Curry with rice. I also love it on baked potatoes or quinoa.


Mango Chutney
Fixings:

- 1.5 cups diced onion
- 5-6 mangoes, diced or sliced
- 1 cup pineapple, diced
- 1 generous cup raw sugar
- ¾ cup vinegar
- 2 tsp red pepper flakes
- 1 tbsp cumin
- 1 tbsp fresh turmeric, minced very well.

In a large pot, cook the onion with some water until translucent. Add in all the spices and cook for about 2 minutes, or until you can smell the spicyness. 

Add in the mangoes and pineapple and let cook for a few minutes to mingle the flavors. Add in the sugar and vinegar. Cook for about 30 mins stirring often to prevent burning. You'll know when it's ready from the thick jam like texture of it all. Let it cool and put in in a sealed glass jar in the fridge.

Not sure how long it lasts, cause here it's always devoured within a few days. 

Enjoy!

Monday, 17 March 2014

Lemon Roasted Potatoes

Coming out of a 3 day water fast, I am seriously more appreciative of food. I did it for several reasons, I have some health issues that are being stubborn and need to be addressed but no way of getting any tests at the moment without a massive bill at the end of it all. It is not something I would generally recommend anyone to do without having actual health issues. It's no juice fast.


The intensity was manageable until the last day, where the watermelon waiting for me was just looking far too good to resist. My goal was to do three days, so I am prettyyyyy happy about it. I'm now in the "re-feeding" process and taking a few days to a few weeks to keep my diet uber simple and very high raw if not 100%.


Good thing I plan ahead and makes recipes ahead of time. These lemon roasted potatoes are amazing and reminiscent of the greek potatoes you can get at fast food places (without all the fat and sodium).


I have a salt addiction and I always find that adding lemon or lime to my dishes instead of copious amounts of salt usually satisfies me. Or at least has me adding only a smidgen or it instead. Also, my partner isn;t a big fan of added salt and prefers to have none, so I compromise and often only add some to my portion.


Enough of my babbling: presenting Lemon roasted Potatoes for your viewing and munching pleasure!


Lemon Roasted Potatoes


- 2lbs potatoes
- 1/3 cup lemon juice
- 1 tbsp lemon rind, grated
- 1 tsp dried oregano
- S/P to taste

Pre-heat oven to 375F

Combine all the marinade ingredients in a bowl and then toss in the taters and coat. Leave them to soak up all the goodness for at least 20 mins, up to 1 and a half hours. Make sure to toss it all now and again to coat. If you are going to marinate for a longer time period, put it covered in the fridge.

Spread out on a baking sheet lined with parchment paper, liquids and all. 

Bake for 45 mins to an hour.

Enjoy!


*** SIDENOTE***

I've just release a FREE ebook "12 Quick and Decadent Smoothie Recipes". You can get it right now by signing up for my newsletter in the right sidebar. Enjoy!